
New Wheel
In 1974 I spent $175.00 for a brand new potter's wheel. It was a lot of money for a college graduate without a high paying job, but I was interested in upgrading from a stand up, homemade treadle wheel that was gifted to me right after high school. I researched types of wheels. I looked at buying a kick wheel kit and casting my own fly wheel. But I didn't want to deal with the weight and I was still living in apartments. Creative Industries had the cheapest electric wheel on the market at the time and that tipped the scale.
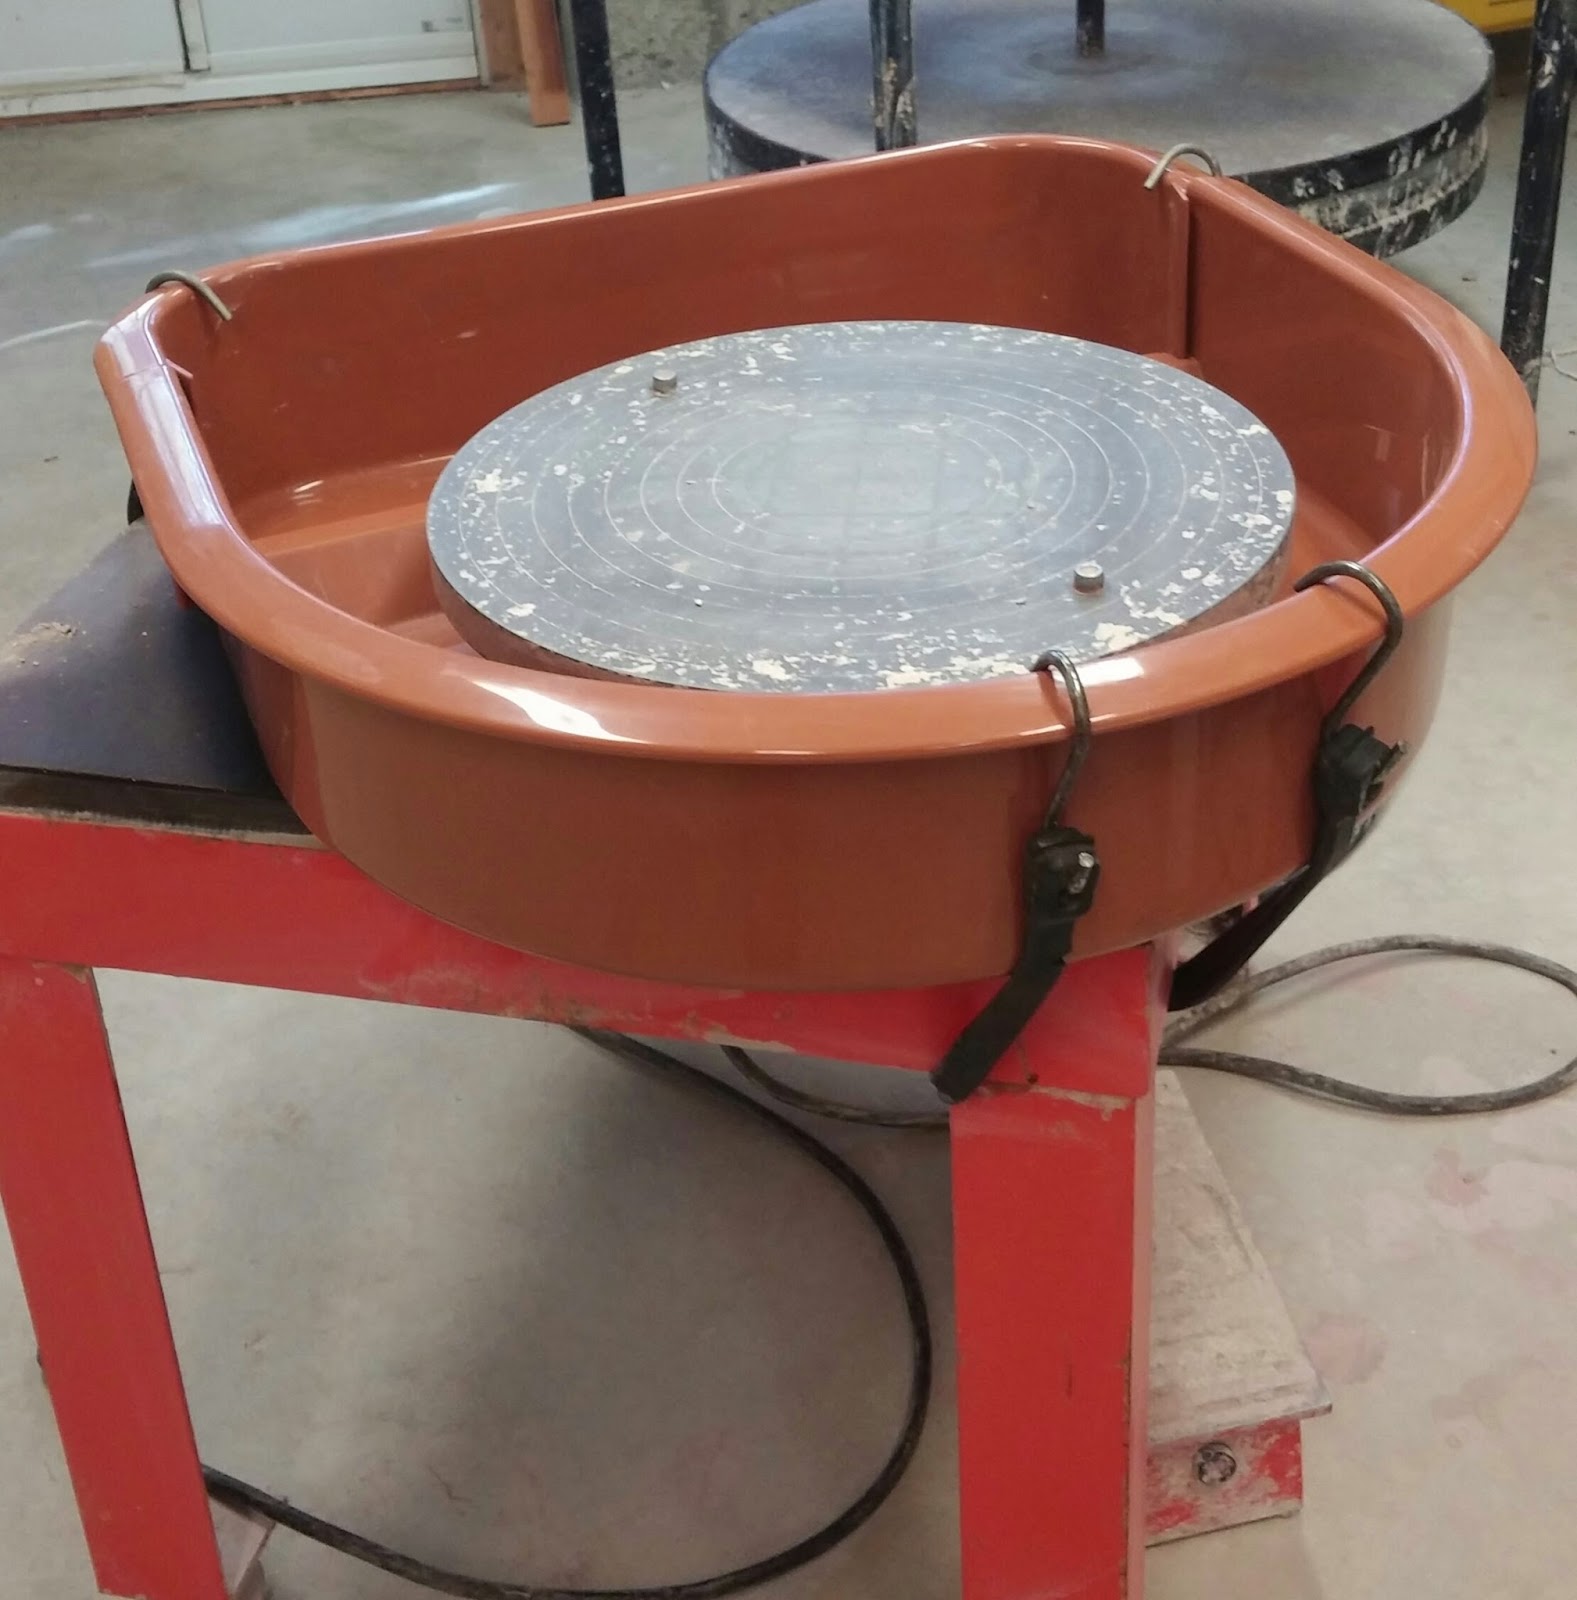
40+ years later, five relocations and hundreds and hundreds pounds of clay, the wheel looked like this.

The wheel has been a real work horse. The only maintenance I have done on this wheel for the past 40 years is a little cleaning and greasing the wheel bearing's through the zerk fitting. When the photo was taken I was deep into making. There was one problem with this wheel that was a constant; the splash pan. It was merely a horseshoe shaped piece of plastic that slid under the wheel head and was held down with two springs; one on each side of the pan.

The springs held the pan to the wheel. Two small holes in the pan that held the springs were covered with silicon to make the holes water tight. The silicone works for a few years, but eventually the silicone would fail, the splash pan would leak and I would need to re-silicone the holes. In the picture above the orange bucket has been positioned to catch the dripping water and clay slop.
This was the condition of the wheel when NCECA was scheduled to be held in Providence, RI.. (See the previous post.) I decided to attend NCECA for many reasons. Since this wheel is no longer manufactured NCECA was the perfect place to find a two-part splash pan that would fit this CI wheel. I spoke to every wheel manufacturer present about retrofitting their splash pan onto the CI wheel. They were all very accommodating but very skeptical as each manufacturer has a proprietary method to attach their splash pan to the table. Many of the splash pans could slide past the bearing under the CI wheel, but some would have hung over the edge of the table. The CI wheel was designed to be sitting on the corner of the table with wheel between one's legs.

40+ years later, five relocations and hundreds and hundreds pounds of clay, the wheel looked like this.
The wheel has been a real work horse. The only maintenance I have done on this wheel for the past 40 years is a little cleaning and greasing the wheel bearing's through the zerk fitting. When the photo was taken I was deep into making. There was one problem with this wheel that was a constant; the splash pan. It was merely a horseshoe shaped piece of plastic that slid under the wheel head and was held down with two springs; one on each side of the pan.
The springs held the pan to the wheel. Two small holes in the pan that held the springs were covered with silicon to make the holes water tight. The silicone works for a few years, but eventually the silicone would fail, the splash pan would leak and I would need to re-silicone the holes. In the picture above the orange bucket has been positioned to catch the dripping water and clay slop.
This was the condition of the wheel when NCECA was scheduled to be held in Providence, RI.. (See the previous post.) I decided to attend NCECA for many reasons. Since this wheel is no longer manufactured NCECA was the perfect place to find a two-part splash pan that would fit this CI wheel. I spoke to every wheel manufacturer present about retrofitting their splash pan onto the CI wheel. They were all very accommodating but very skeptical as each manufacturer has a proprietary method to attach their splash pan to the table. Many of the splash pans could slide past the bearing under the CI wheel, but some would have hung over the edge of the table. The CI wheel was designed to be sitting on the corner of the table with wheel between one's legs.
A practical solution would have been to purchase the best splash pan candidate from the web and try it out. But, the impractical part of me decided to purchase a new wheel! I purchased the entire Clay Boss demonstration wheel for a discount from the good folks at Speedball Arts. After all, it came with a splash pan!!
I put the wheel into our van, and drove an hour back home. The only item that had to be solved was a method of securing the pan to the CI table. The Speedball people told me that they redesigned their splash pan a few years ago. It may have been previously made from lighter weight plastic. The new design is very rigid and is comparable to anything else on the market.
On the soggy ride home, the idea of attaching the rigid plastic splash pan to the table using bungee cords came into my mind. It worked perfectly.
Now I have two wheels and the studio will be so much cleaner.


Nice looking wheel Neil. So, I am somewhat confused. Did you buy a new wheel AND a new drip pan for the old wheel?
ReplyDelete