Posts

Showing posts from 2012

Pop Up Camper Repair - Part 6 - Finished

Image
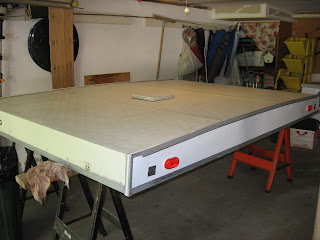
After creating this blog, I think I should have titled it, Pop Up Camper ROOF repair...as that is what I accomplished.  But now I have a list of mods and repairs I would like to get finished over the winter. The roof was put back on the camper and the lift arms (with new springs and cables) work great.  The roof "pops up"...imagine that!  Here is a picture of the folded camper. When I was putting the lift arms on, I noted that the particle board used in the body of the camper had deteriorated around the bolt and T-nut. I needed to put wood filler in the bolt holds and re-drill the holes.  I was surprised that the original design of these campers had the weight of the roof and the canvas at these four points without any other support.  I didn't have time to make any more repairs, so I took four corner supports (purchased at the local hardware store for a dollar or so) and bolted them to the body creating a "V" for the bolt to rest in.  It was cheap and fast

Pop Up Camper Repair - Part 5

Image
This weekend, I was able to put the roof back together again. It is still not attached to the camper as the new springs and cables still have to be installed on the lift arms.  That task is on the agenda for this week.  Here are some pictures. Once I put the running lights on and wired them up, my daughter and grandson (visiting) and my wife and I flipped it right side up.  I also will get some paint and hand paint the "Palomino" name.  Nearly done.

Pop Up Camper Repair - Part 4

Image
I had to wait a week for the new aluminum to arrive.  It did on Thursday.  I was able to cut both side wall pieces and get one side attached with construction adhesive this weekend. Once I built the box, I just couldn't put the old painted aluminum back on...but as you can see the bright white sides are going to stand out unless I can clean the aluminum on the top.  The clamps on the other side are holding the far side of aluminum. Once this side's adhesive is cured, the rebuild will be finished.  The next step will be to put it all back together, repair the lifting arms and reattach the roof to the camper.  Next weekend hopefully!

Pop Up Camper Repair - Part 3 - Roof Box Completed

Image
Lucky for me, although I didn't have much of the wood pieces to use as templates to make new front, back and sides, I did have the aluminum pieces that I could use.  Without these I would have been toast!  So I spent a few days cutting new wood, shaping, gluing and attaching these pieces to the roof.  See the results below. My plan was to use the old aluminum sides, but after finishing the box frame and holding these old, bruised, painted sides up to the new wood, it seemed just wrong.  So now I am on the hunt for aluminum sides.  This may take a few days to find and acquire.  I may not be doing much to the project for the next few days.

Pop Up Camper Repair-- Part 2--Oh Oh

Image
Once the roof was in the garage, I went to work removing the aluminum channels and skin to find out what I was working with.  OMG!  One side wall was completely gone.  I mean gone.  There was nothing between the two pieces of aluminum but sawdust and rotten fragments of wood.  The ants had had a feast while the camper had been parked for the year. There is a wood frame around the outside of the roof.  The inner core looks like rigid insulation.  This wood frame was also gone on one side and so wet on the back, front and other side, I decided I would remove all of this also.  Actually, I had no choice with the one side, as that was missing as much of the roof wall above it was. Note the orange can of ant spray.  That was my main weapon against the ants that just kept on coming. So this is what I was facing after a day of removing all the metal.  A roof with the rigid insulation sandwiched between the top and bottom pieces of aluminum. This was going to be a bigger pr

Pop Up Camper Repair - Part 1 Let's Remove the Roof

Image
Prologue A few years ago I purchased a 1981 Palomino pop-up camper from a 1st grade teacher.  It was an impulse buy.  I know nothing about pop up campers. But now I know I paid a bit too much for the unit.  We have used it for 5 years without much maintenance.  But we still paid too much. The picture above is a few years ago with the camper set up.  It is rough but functional What I knew was that the wood on the roof was a bit sketchy...and when the lift arms cables broke after the season in 2010, it was time to undertake fixing the roof.  Due to a few circumstances beyond my control, I couldn't fix the roof in 2011.  So this May (2012) we began the project. The Roof Repair With the help of reading posts on www.popupportal.com and obsessing about this for a year in my head, I began the process.  The first trick was how to remove the roof.  The external lift arms had to be removed to repair the spring / cable mechanism anyhow. The roof arms are spring loaded.  In the e

StylishHome picked up a Teapot!!!

Image
Hi.... One of my teapots was selected by the StylishHome eCatalog.  This catalog showcases some of the items available on Etsy. You can open the catalog  here  .  Browse and Enjoy